
[ad_1]
See how Jamie Lindholm blends together distinctly different images to make a statement about the interconnectedness of everything in this step-by-step art demo.
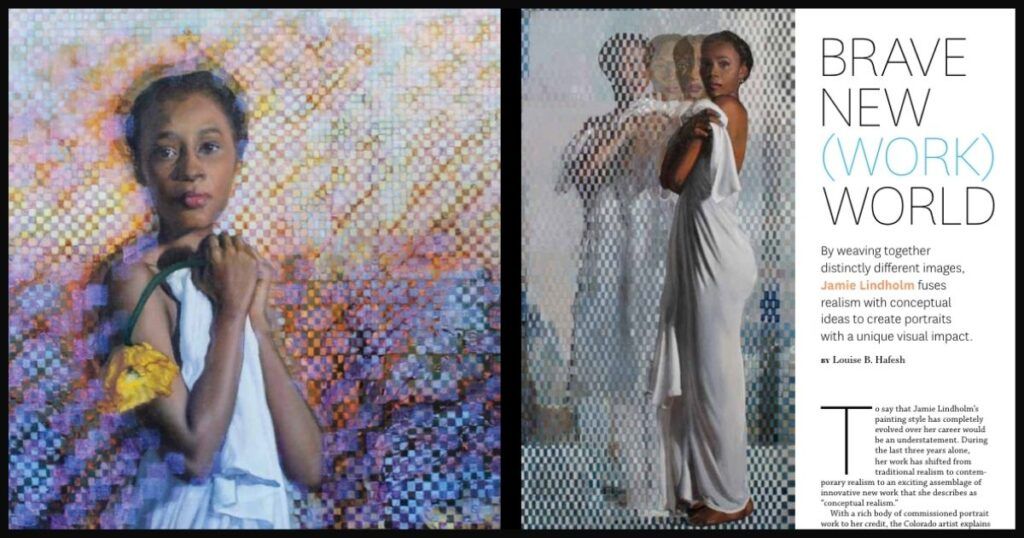
Behind the Unique Style
In the process of getting her Masters, Jamie Lindholm had a creative epiphany that took her work in a new direction. “I was sitting in my Colorado studio,” she says, “but I was thinking about the summer my family had just spent in Sweden—conceptually experiencing both at the same time. That’s when the idea came to me to weave together two separate images—to fully entangle them—and then have a model appear to emerge from the weaving into our three-dimensional viewing space.”
Bringing the Concept to Life
Lindholm does most of her compositional work in Photoshop. She adds, removes, and rearranges elements to create her vision of interconnectedness by weaving together distinctly different images to form a base reference. For smaller works, Lindholm works old school, taking both images, and literally cutting them into strips, which she weaves together. Then, working through multiple layers of paint, she gradually brings out a figure or figures from the weave.
“It’s as if the subjects themselves are aware of their entanglement with the various planes of energy,” she explains. “From there, I just develop the focus, so it appears less ‘woven’ and more three-dimensional.”
Step-by-Step Art Demo by Jamie Lindholm
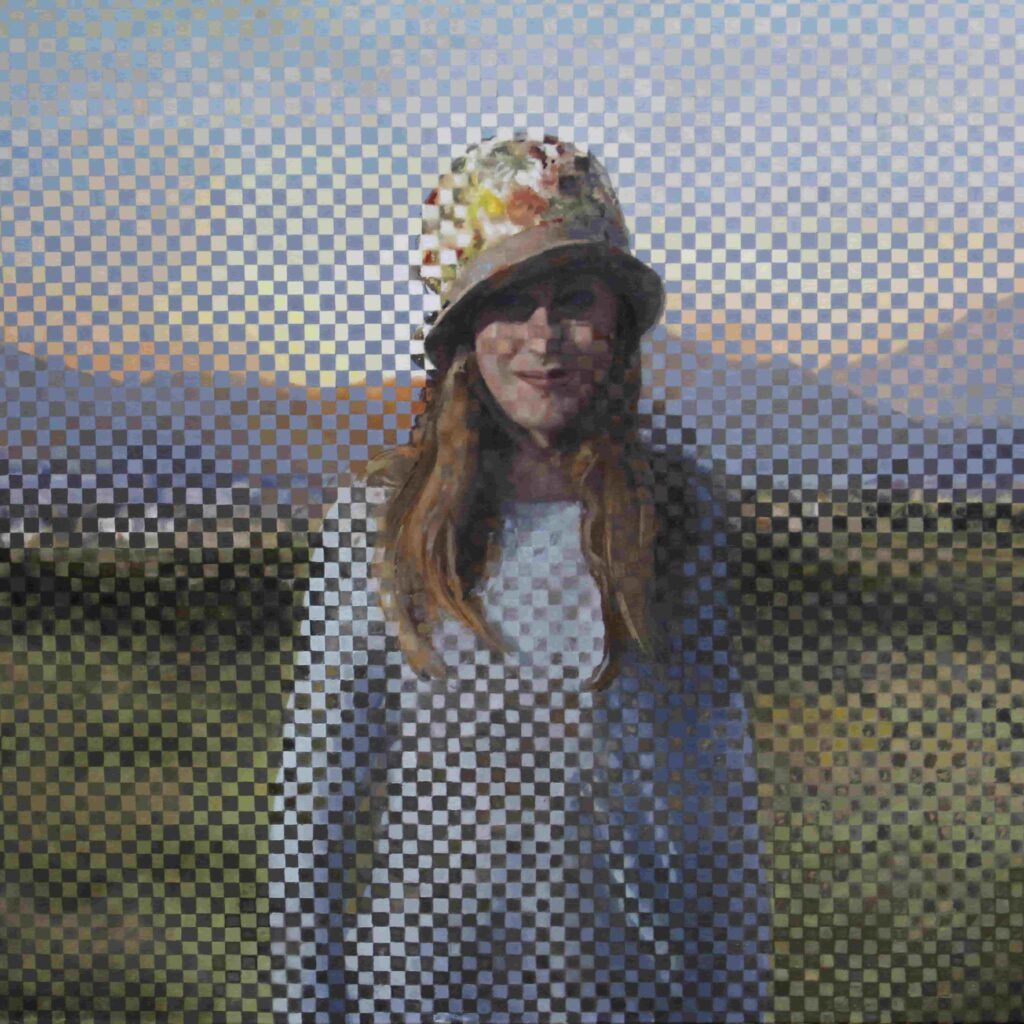
The Interconnection of Sunshine and Smiles is a weave that combines my model, Allie, standing in a local open space, with the sunset view of the Boulder Flatirons that I see from my studio.
Artist’s Materials:
- Rublev Lead White #1
- WN Cadmium Yellow Light
- Gamblin Yellow Ochre
- Gamblin Cadmium Red Light
- Gamblin Magenta
- WN Burnt Sienna
- Gamblin Cerulean Blue
- WN Ultramarine Blue
- Gamblin Green Gold
- WN Olive
- Williamsburg Corbet Green
- Vasari Raw Umber
- WN Ivory Black
- Williamsburg Neutral Grays 2,4,6,8
- Golden Neutral Gray #6 acrylic
- Centurian Universally Acrylic Primed Linen panel
- Silver Brush Ltd brushes
Step 1
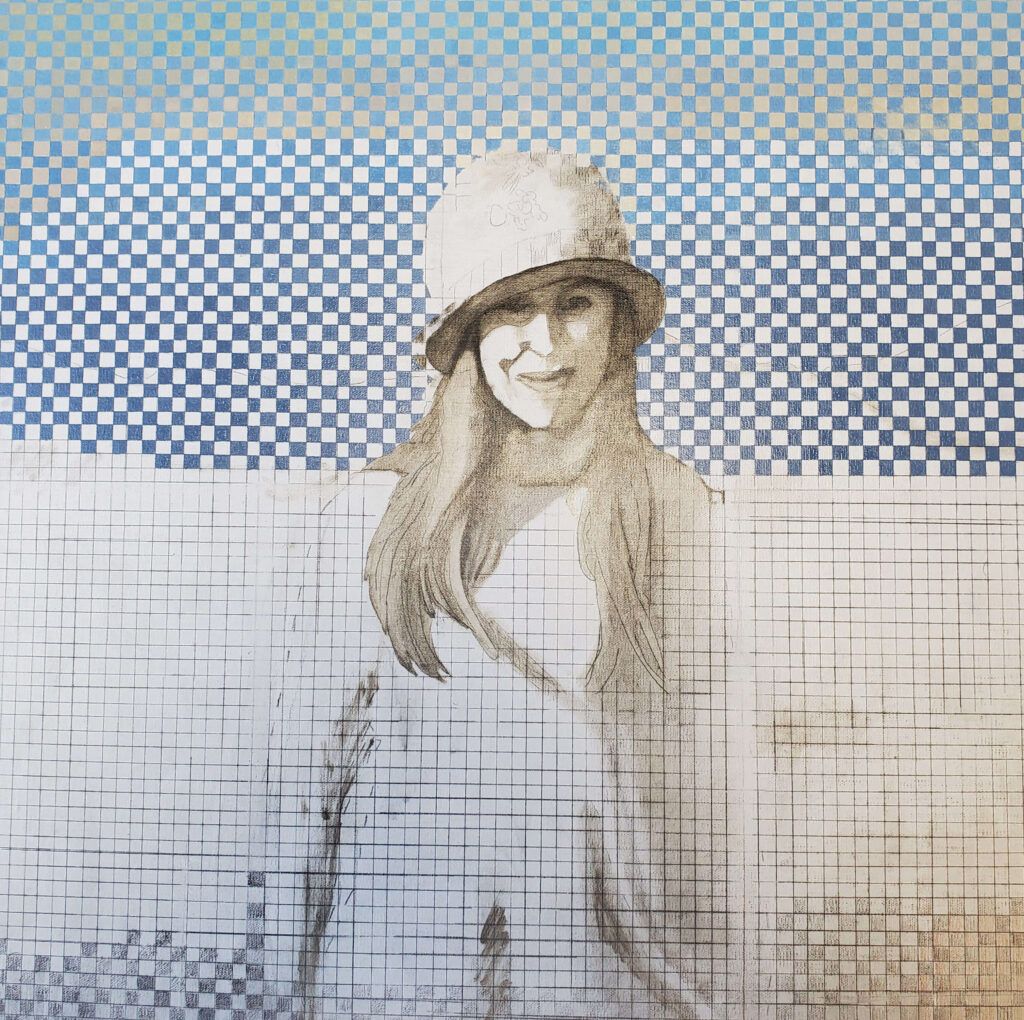
First I wove the two images together and created a layered sketch in Photoshop. Then I transferred it to a universally primed panel. Because it is an acrylic priming base, I used a thinned wash of the Golden Neutral Gray #6 acrylic to block in the shadow areas of my model, her clothing, and some of the landscape around her.
I premixed an ample amount of color for the sky region, so I proceeded to paint in the base layer fairly methodically, starting in the top left corner. I tried to stick to the areas of the sky that were the same chroma and value before making adjustments to the mix and moving on to the next level. The sky in this half of the weave was fairly consistent, so it could move a little faster, though this is not a fast process at all.
Step 2

After completing the first layer covering half of the weave, I started back at the top with the other image. This required a little more concentration as the temperature and chroma changed faster from the top of the panel to the section where the mountains start. When I arrived at the woven areas of the hat, I took a break to complete some direct painting, which allowed me to paint with longer, freer strokes with a larger brush (size 4 filbert hog bristle).
Step 3
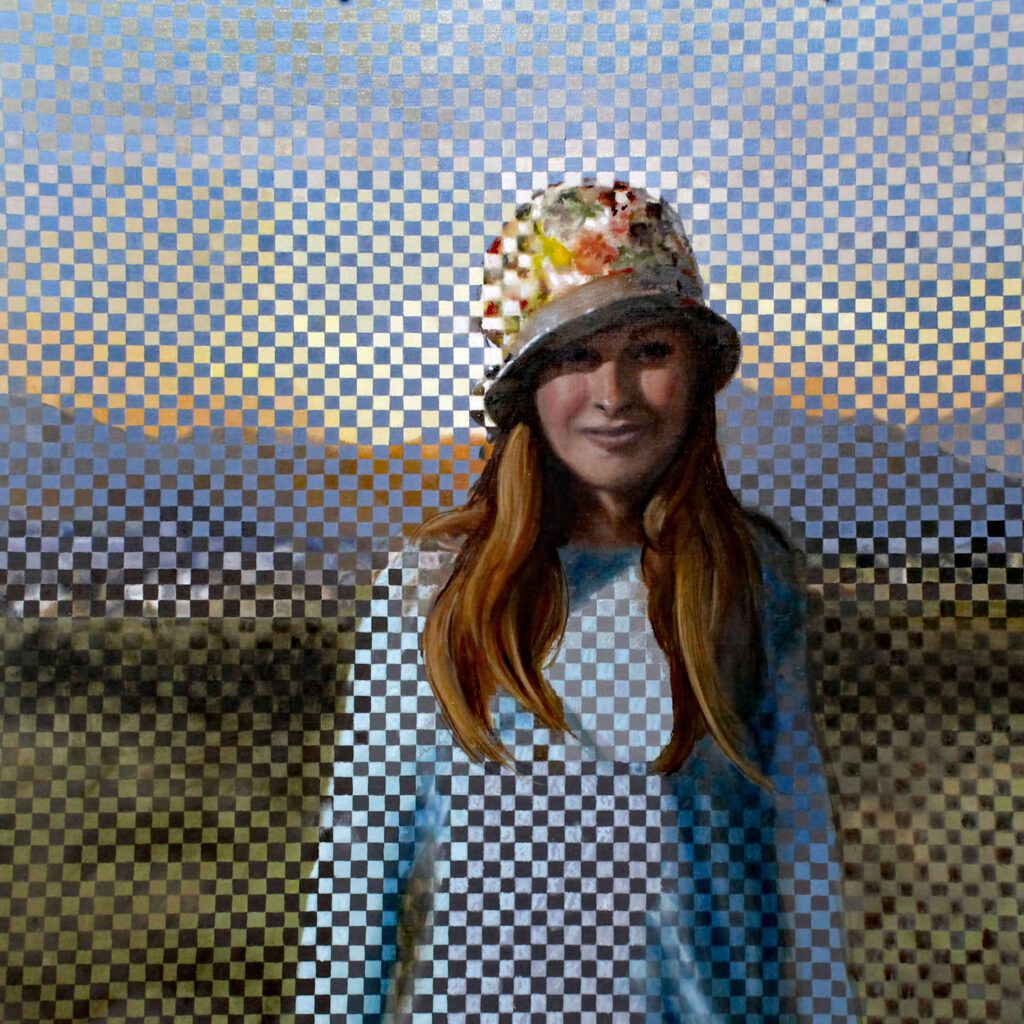
Once the entire panel had a complete layer of paint, I started the process all over again. The next layer is completed in sections instead of every other square, and it often takes all day to complete a section that is about 4×4 inches. During this process, I am unifying the weave so the edges are blended and refined, and deepening the variations in the color.
Step 4
When I need a break from the weave, I concentrate on my model and define the shadow, light, and form of the face and hair. I do not spend an enormous amount of time working out every detail because I know that I will come back in with some sheer weave into her face and hair to represent the interconnectedness concept. At this point, I glazed into the mid-ground landscape with a deeper, lower chroma green and then let it sit to fully dry.
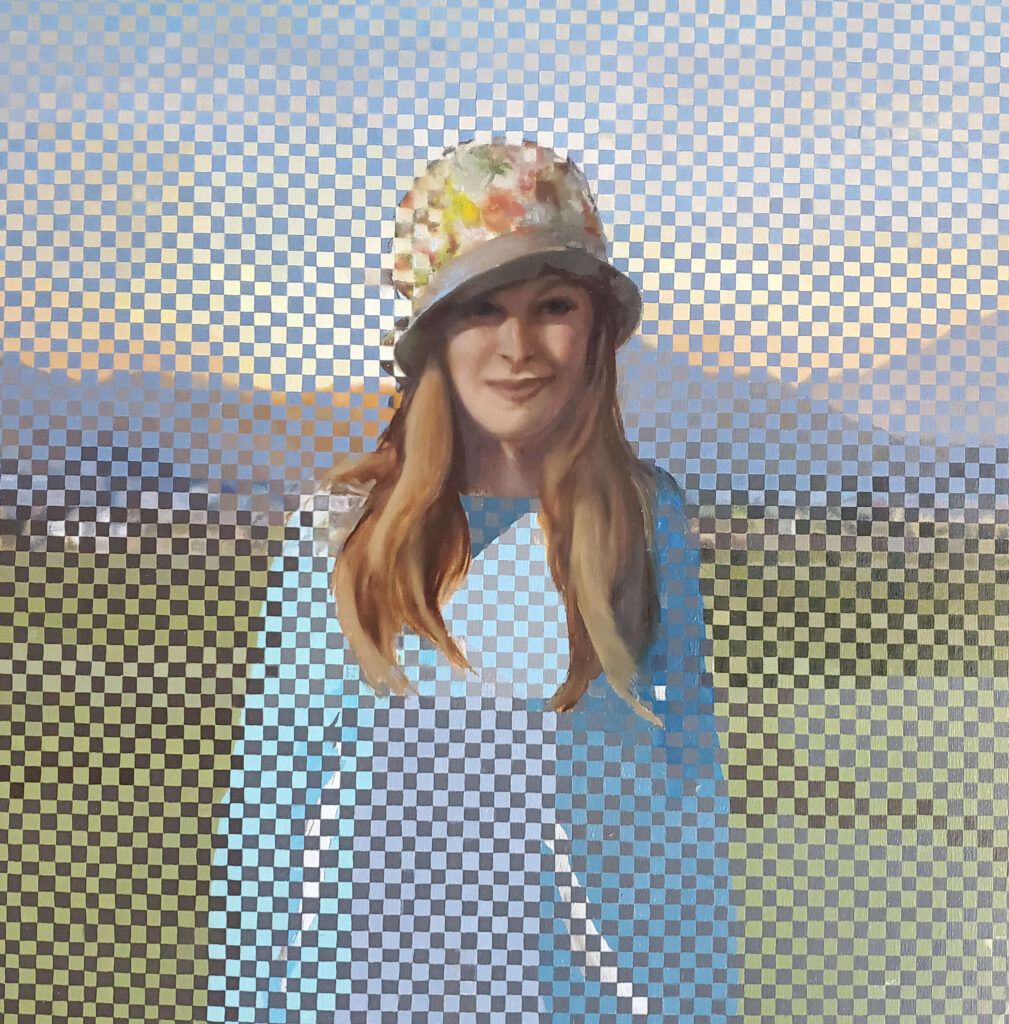
Step 5
In the final pass, I enrich and add texture to the landscaping along with adding the details to, and deepening, the shadow side of her sweater. I also came back into her face and hair to add a hint of the weave, leaving her eyes and smile weave-free. This represents the connection of her happiness to the sunshine and landscape.
Explore More of Jamie Lindholm’s Work
Jamie’s unique style is the result of many years of exploration and experimentation. Read more about her journey and see more of her work, plus another step-by-step art demo, in the May/June issue of Artists Magazine.
About the Artist

Colorado artist Jamie Lindholm combines her atelier training with intuitional realism to create art that has been exhibited nationwide and internationally. Her art is part of permanent collections, including that of the International Securities Exchange, in New York City, as well as many private collections.
Lindholm is a member of the Portrait Society of America, where she served as coordinator for its Ambassador Outreach Program for many years. She’s also a Signature Member of American Women Artists and an elected member of Allied Artists of America.
You might also like these art demos:
Secrets of Imaginative Painting: A Demo by James Gurney
Demo: How to Use Watercolor on YUPO
How to Paint Abstract Art: Develop a Composition
[ad_2]
Source link


More Stories
Things to Consider Before Running a Half Marathon
Penn State Trademark Case Produces Potential Problems For Sports Teams And Merchandisers
How to Make Your Social Media Posts Snap!