

This post may contain affiliate links. Please read my disclosure policy.

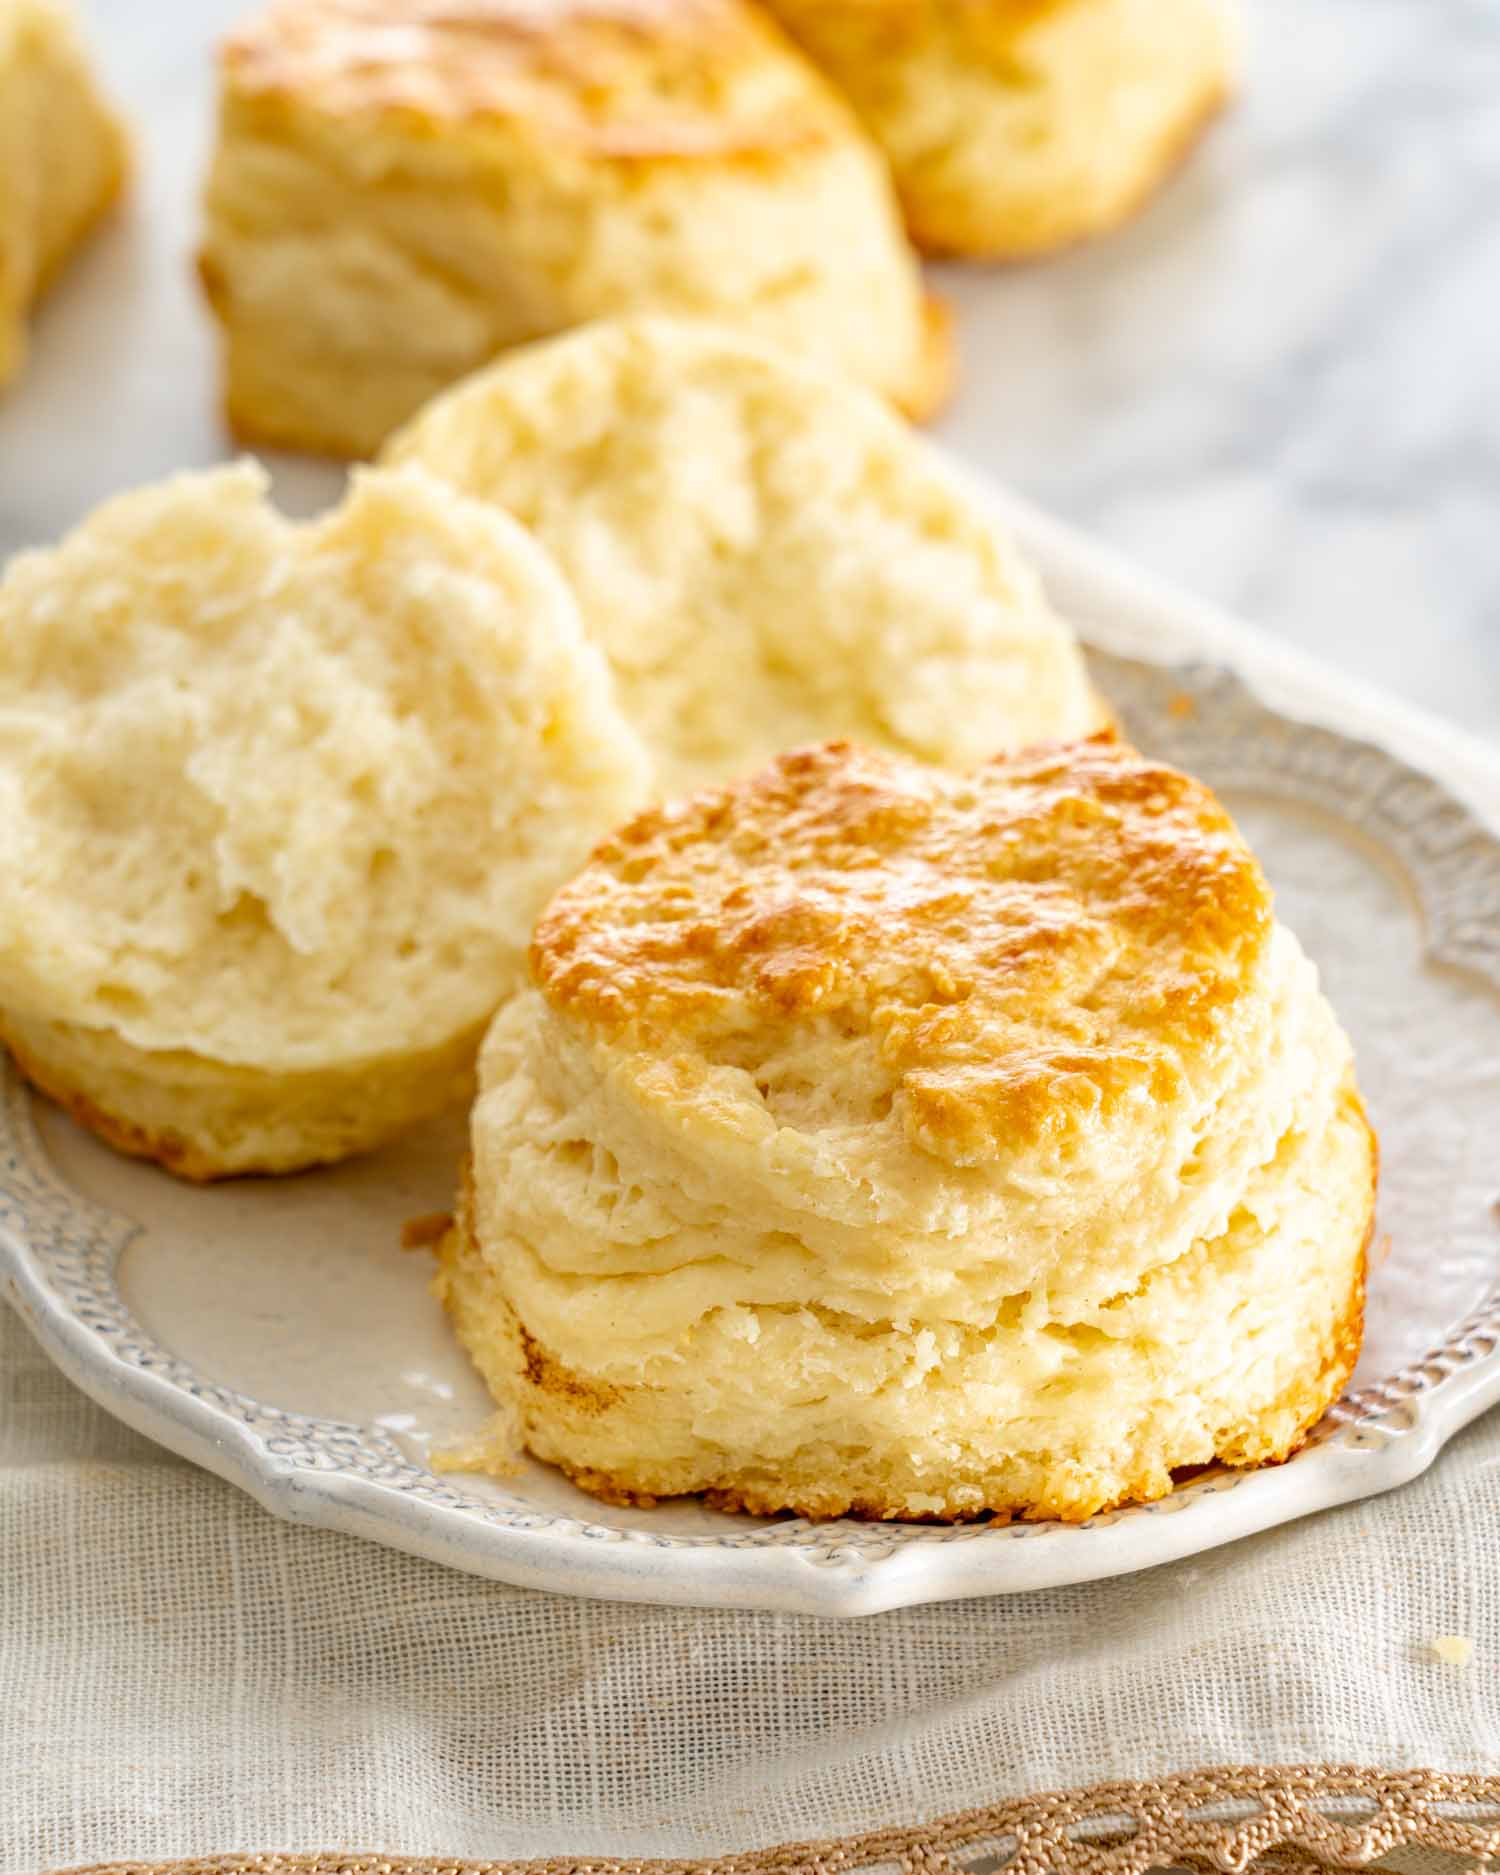
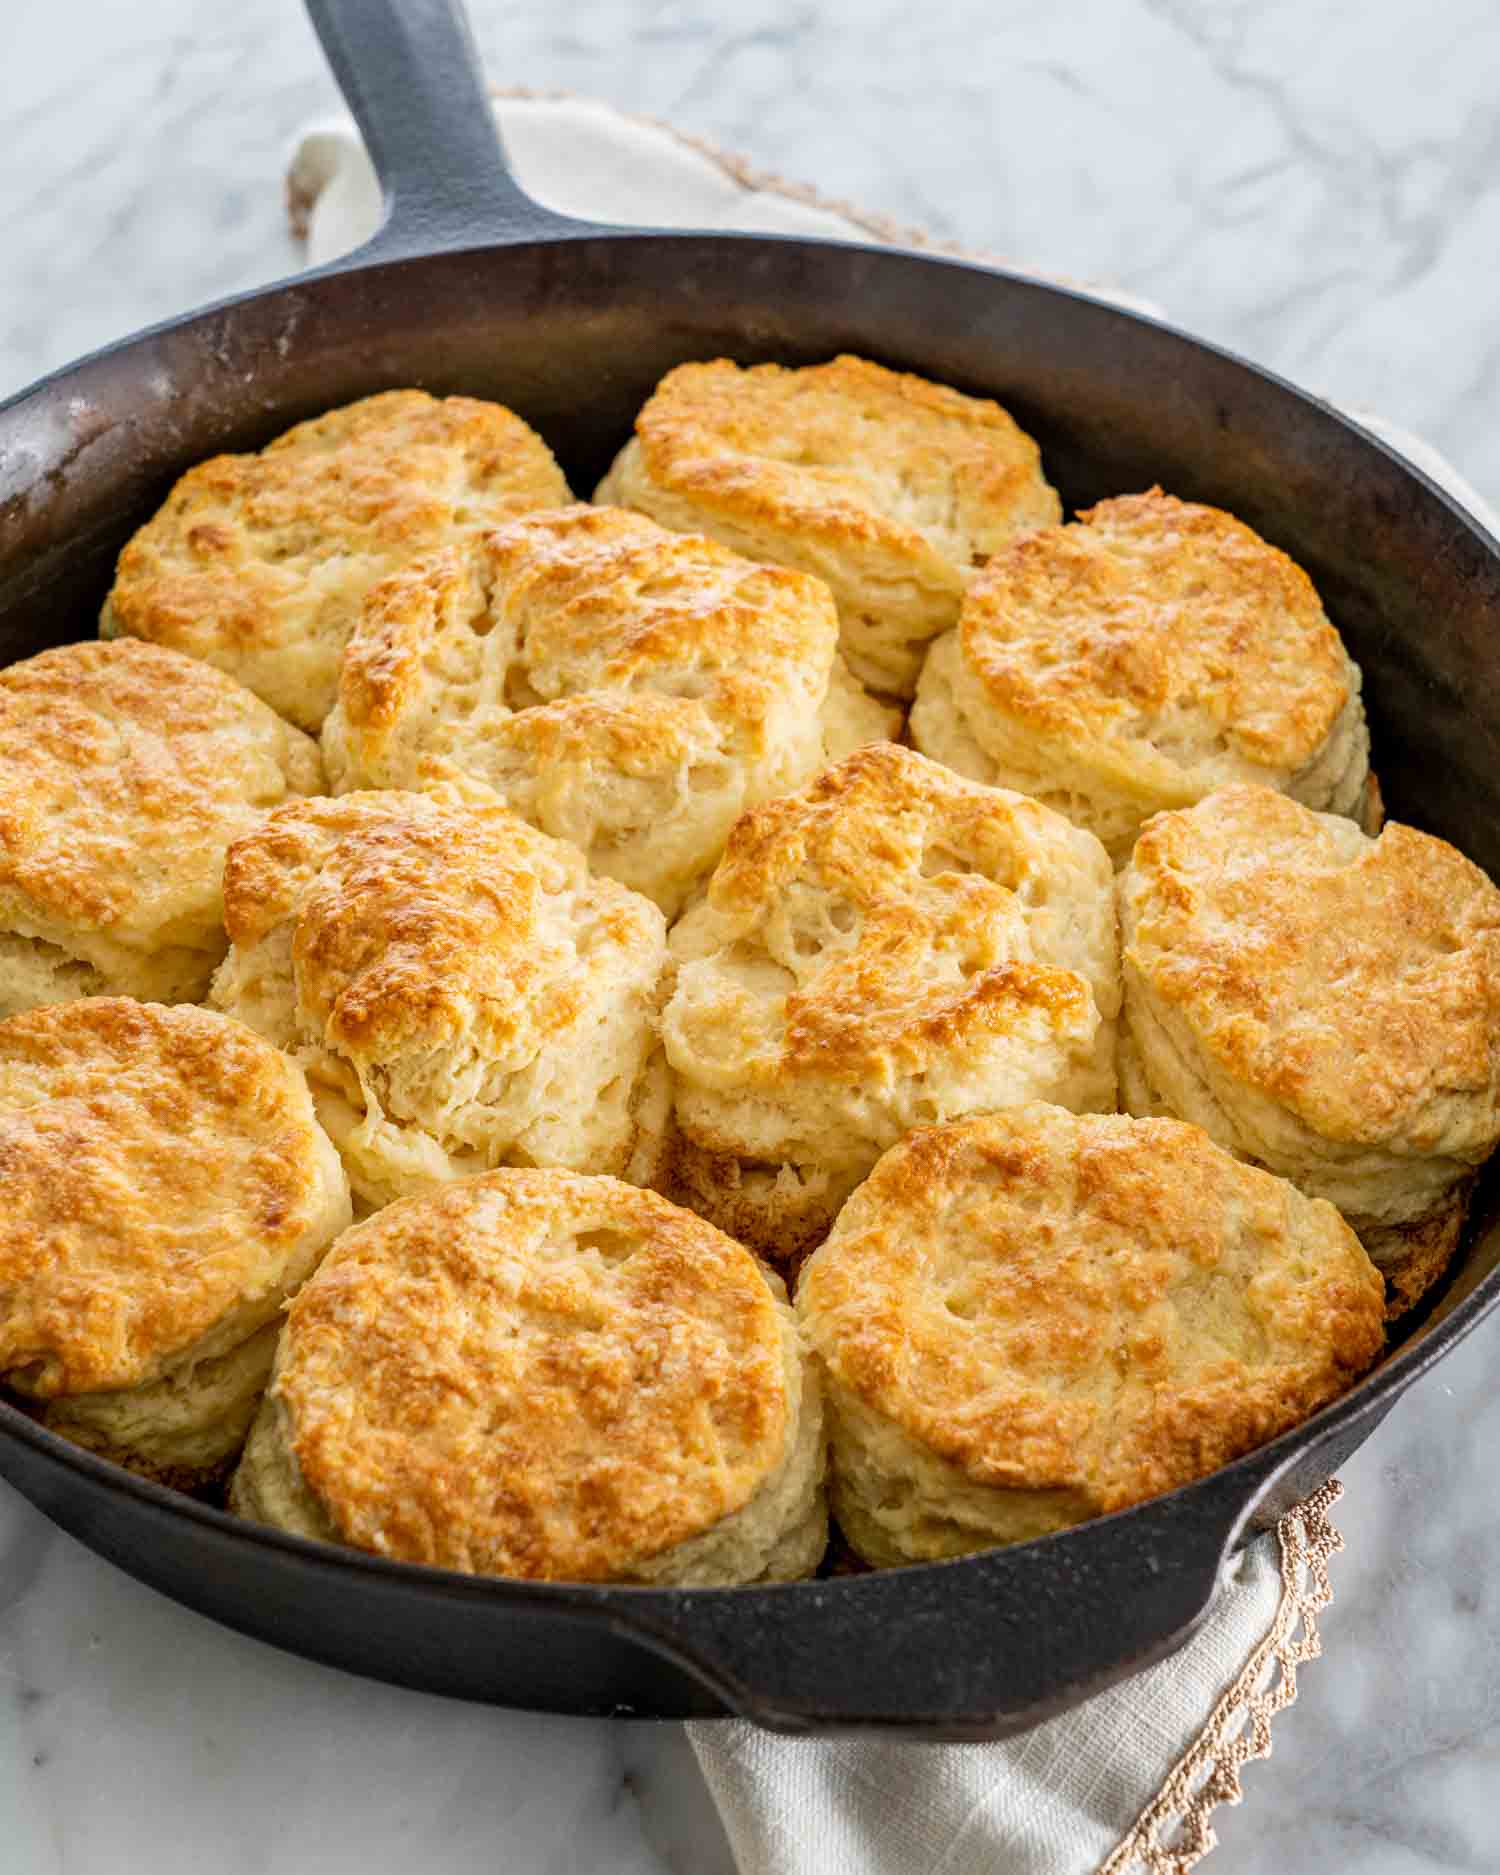
These Buttermilk Biscuits are flaky and buttery, melt in your mouth delicious! Incredibly easy to make, completely from scratch and ready in 20 minutes.
The Best Buttermilk Biscuits Recipe
Biscuits are one of my favorite things to bake often. This recipe for biscuits is super simple to make and with only a few ingredients, meaning you can have fresh buttermilk biscuits in only a few minutes! Who would’ve ever thought it was possible?
This recipe will make about 14 biscuits, may vary depending on size. Because of all the butter and buttermilk, they are very flaky. I love to keep these on hand for breakfast, lunch, and dinner regardless of how you serve it.

Why You’ll Love These Buttermilk Biscuits
- Quick and Easy! Using this simple 7-ingredient recipe you can have fresh homemade biscuits from scratch in just 20 minutes with just a few simple pantry ingredients.
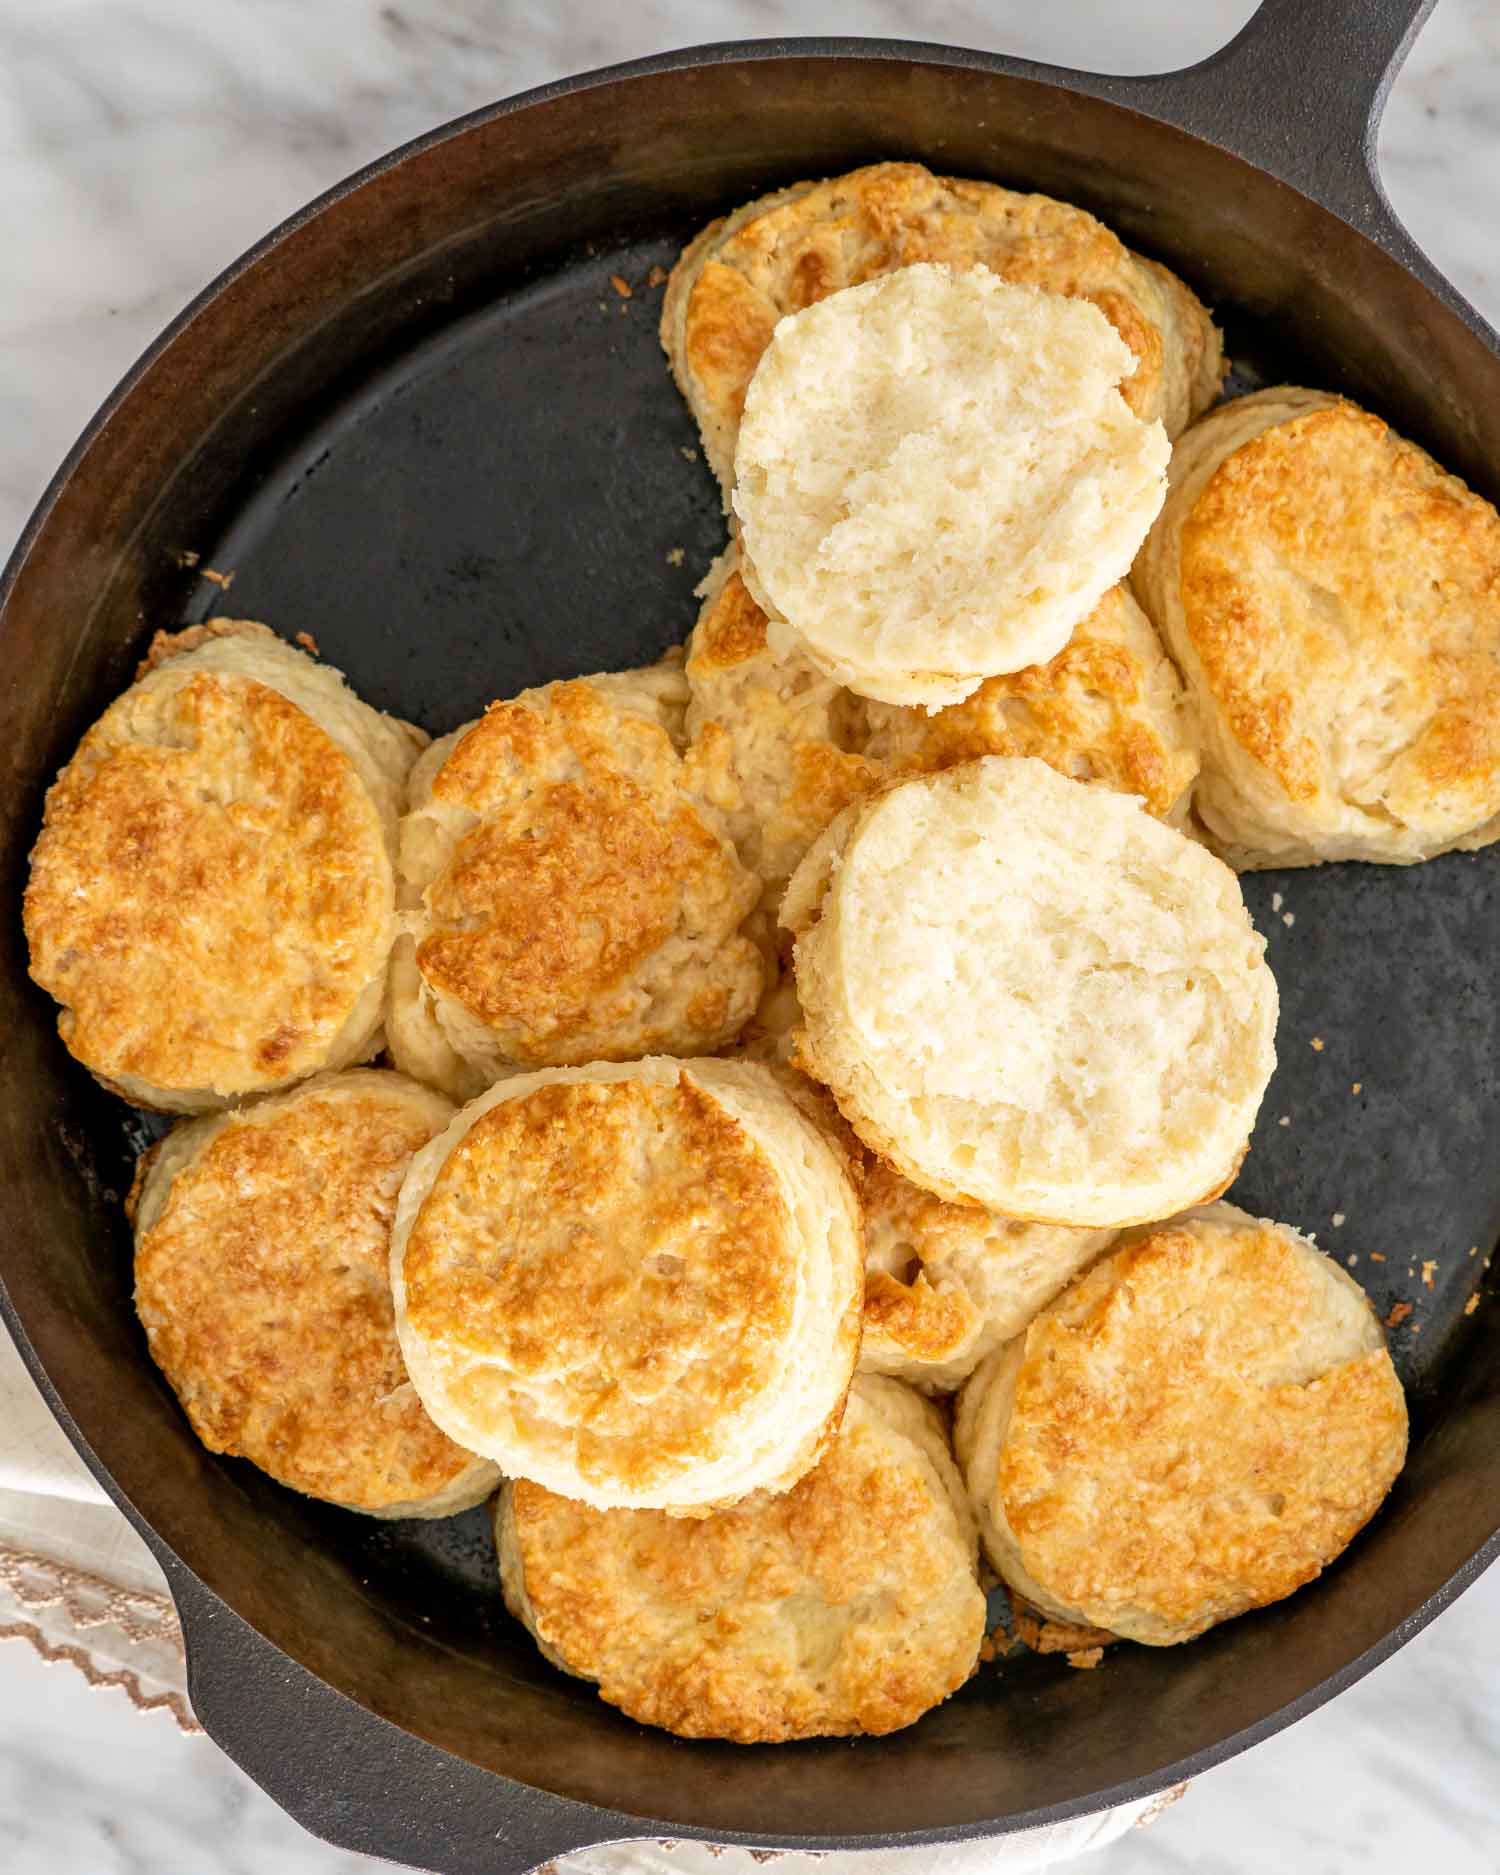
- Classic Buttermilk! With a classic buttermilk base, these super tender buttery biscuits with flaky layers are baked to golden brown perfection and absolutely delicious with each bite.
- Family Favorite! You can’t go wrong serving biscuits. Whether it’s with eggs and sausage gravy at breakfast or with chicken stew at dinner, your whole family will love this recipe.

- Buttermilk – We want cold buttermilk for this recipe, be sure to shake it too before using.
- Flour – I used all purpose, my old stand by. Be sure to keep extra flour on hand.
- Leavening agent – We’re using both baking soda and baking powder today.
- Salt – So important for guaranteeing we get good flavor! Don’t forget the salt.
- Butter – Cold and unsalted. You can either cut this in cubes or shred it on a box grater. I find this easier to blend in with the flour, up to you.
- Egg – Just for egg wash at the end.
Imagine fresh hot biscuits in 20 minutes! Well, you don’t have to imagine anymore. You just have to follow these simple steps. This is the easiest buttermilk biscuit recipe you will ever make!
To get started, preheat your oven temperature to 450°F (232°C) to get it ready for baking! Then grab a baking sheet and set it aside for now.
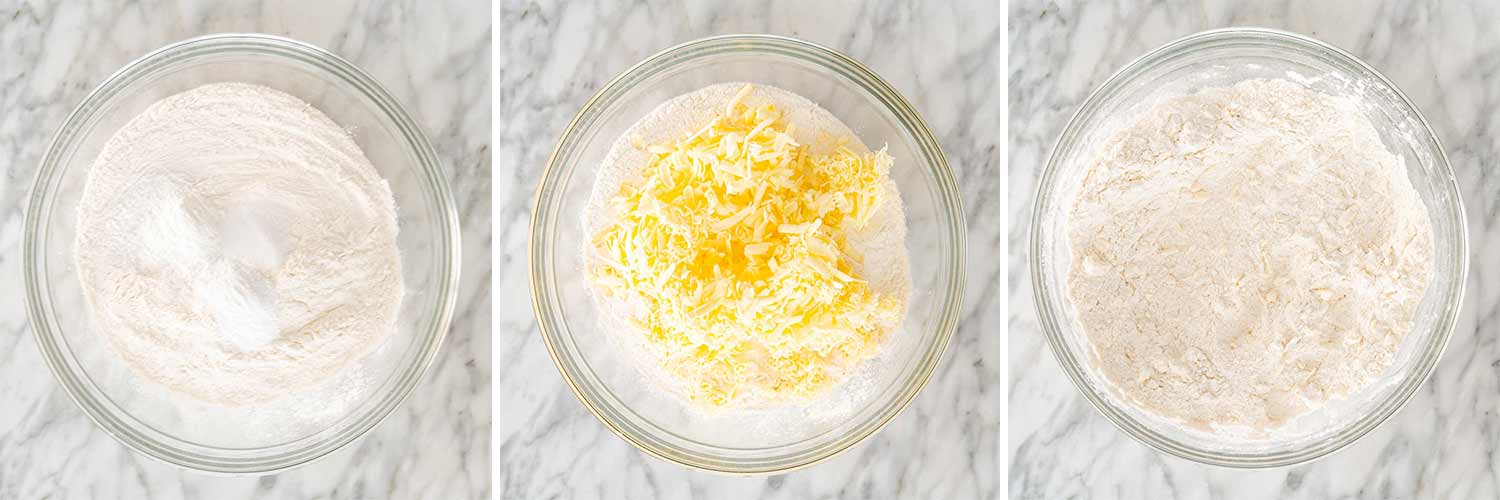
It’s important to measure out the dry ingredients in a separate bowl. Add the flour, salt, baking powder, and baking soda to a large bowl and stir it together well. Make sure the butter is super cold before adding it to the flour mixture. Then cut the butter into the flour using a pastry cutter until the mixture resembles coarse crumbs. You can also do this using 2 forks.
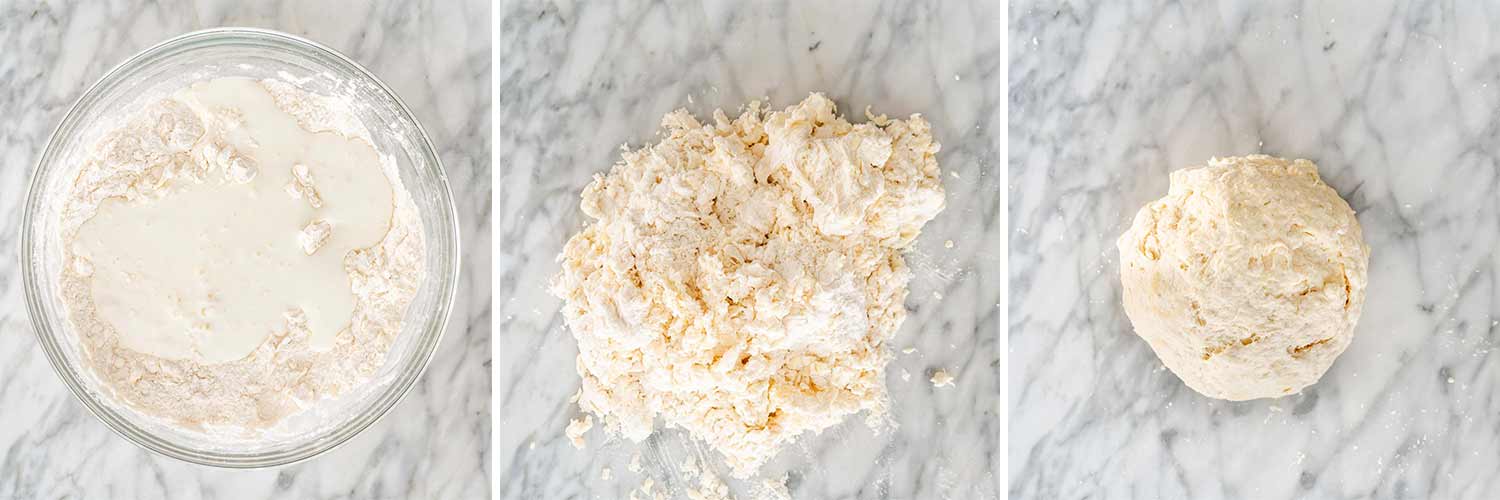
Now, stir in the buttermilk and combine everything together using a wooden spoon. Then knead the dough a few times with your hands just until it barely starts to come together. Next, transfer the dough to a lightly floured surface and knead it just a few more times, being very careful not to over-knead. You don’t want the butter to start melting because it will cause the dough to begin developing gluten and become tough.
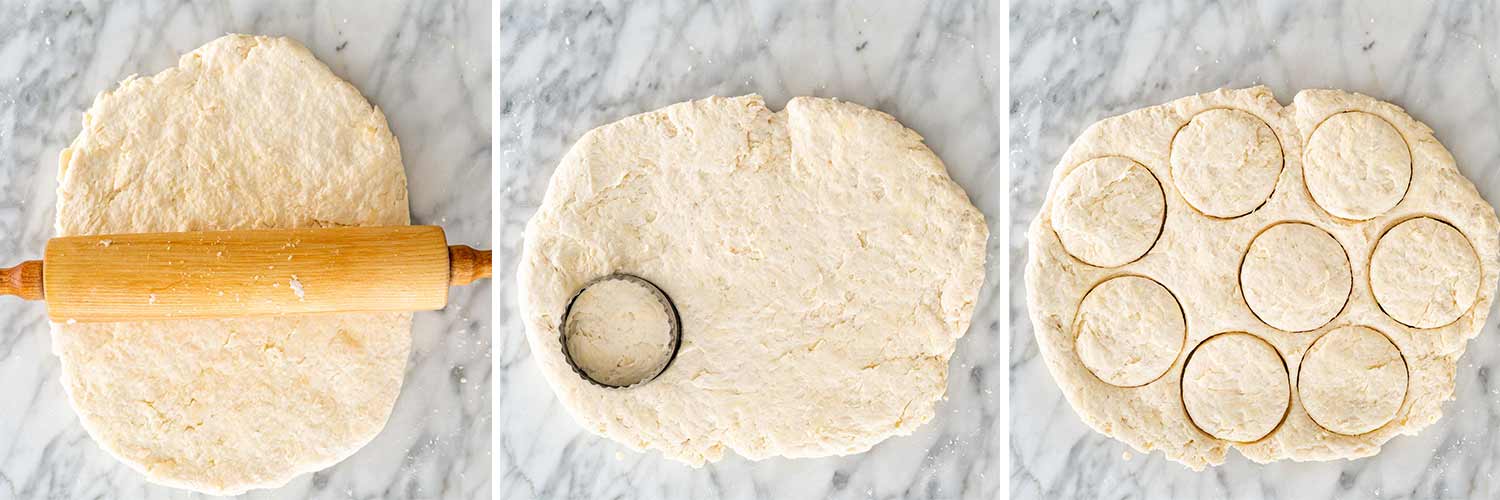
Once the dough is made you can start forming biscuits! First, use a rolling pin to gently roll the dough out into a rectangle that is about ½ to ¾ of an inch in thickness. Next, use a 2-inch biscuit cutter to cut the dough into biscuits. Then place the cut biscuits on the ungreased baking sheet or into a buttered skillet. Now, gather the leftover dough and use it to cut more biscuits until there is no dough left. You should get about 12 biscuits.
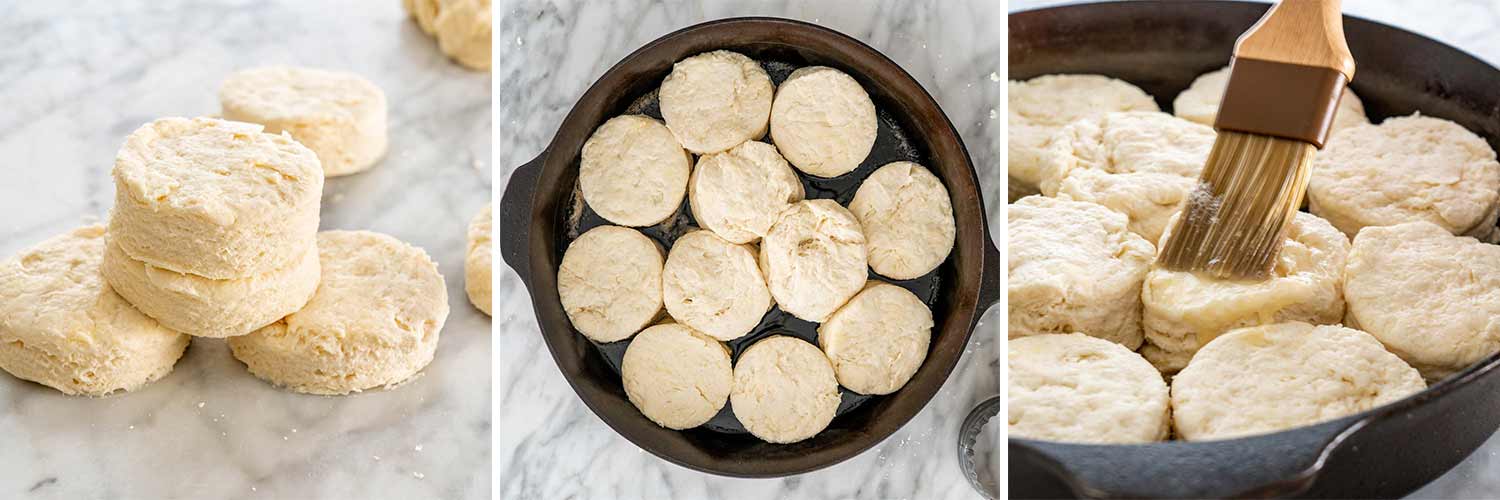
Place the biscuits on an ungreased baking sheet or in a cast iron skillet and brush with the egg wash to get a nice golden color as they bake.
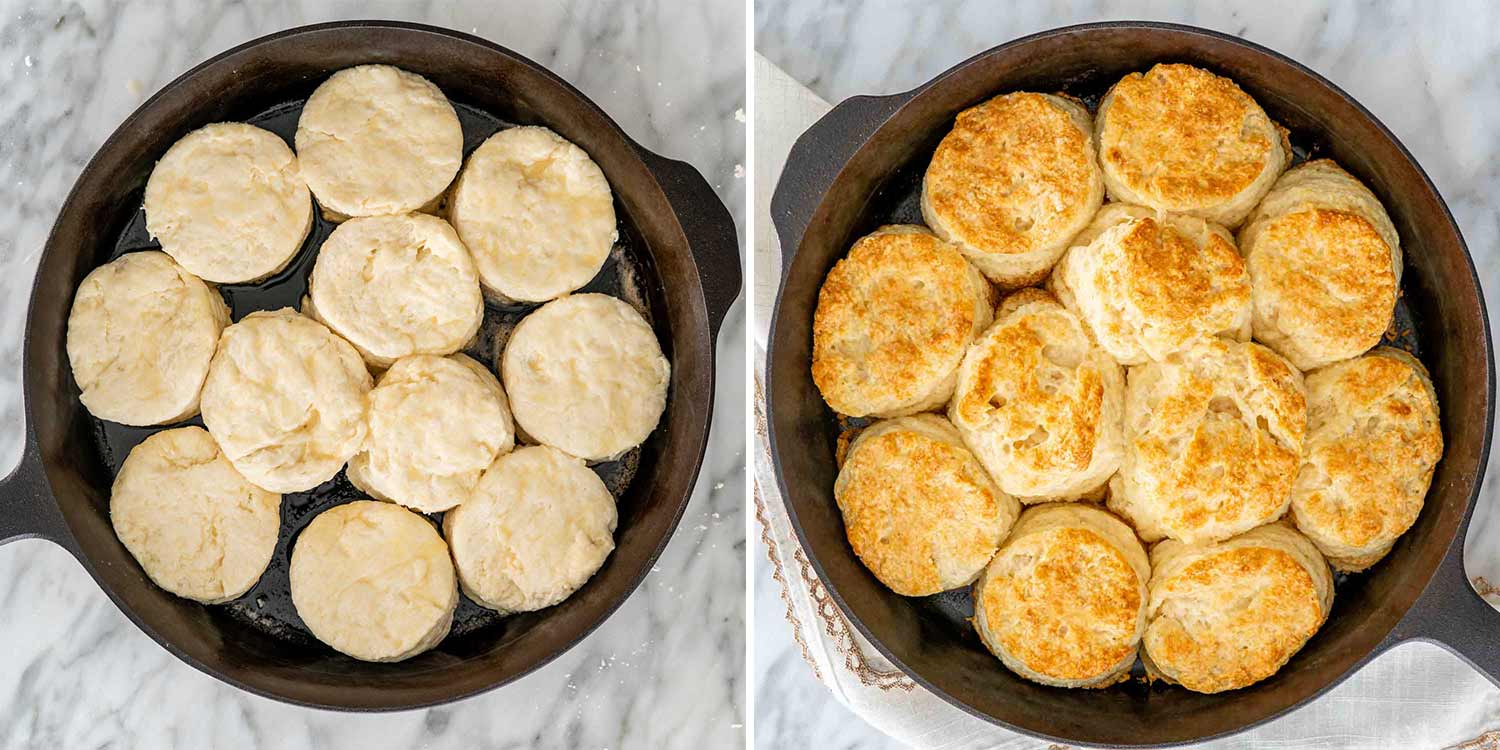
Now let’s bake! Transfer the pan to the hot oven and bake the biscuits for 10 to 15 minutes or until golden. Then transfer the baked biscuits to a wire rack to cool.
Why Buttermilk?
First of all, the buttermilk will add complexity and depth to your dinner rolls. Secondly, it’s what makes these dinner rolls super soft and light and what keeps them from browning too quickly so that you end up with rolls that are baked perfectly on the inside yet golden on the outside.
No Buttermilk On Hand?
If you don’t have buttermilk, use a measuring cup and to it add ½ tablespoon of lemon juice or vinegar and to it add milk to make ½ cup. Stir it then let it sit for 5 minutes.
Can I Use Shortening Instead Of Butter?
Yes! You can use vegetable shortening and the biscuits will be flaky. However, it will change the taste and they won’t be buttery. Another option is to use half butter and half shortening.
Can I Make Gluten-Free Biscuits?
Probably yes, but I’ve not tried. However, make sure to use a 1-to-1 gluten-free flour that has xanthan gum in it, which acts as a replacement for the gluten that is naturally in all-purpose flour.
Expert Tips
- Always use cold ingredients! This is the key to a flaky biscuits with separate layers. I usually don’t take anything out of the fridge until I’m ready to use that ingredient in the recipe.
- Do not over knead and be gentle. The more you work your dough, the more gluten you develop, and the more gluten you develop the tougher your biscuit will be and more prone to shrinking. Remember, treat it with love and be gentle.
- Use fresh ingredients, specifically your baking powder and baking soda. The baking powder is what helps the biscuit layers puff up.

How To Serve
The sky is the limit! You can smear these buttermilk biscuits with some jam or smother them with butter and honey and you’ll be in paradise till the very last bite. But if you want some entree accompaniments, here’s some suggestions:
Leftovers
These biscuits will stay fresh for up to 3 days in covered and stored at room temperature.
Freeze
These buttermilk biscuits also freeze well, just be sure to freeze them spaced evenly on a cookie sheet before placing in a freezer bag or airtight container. This method will allow them to stay fresh for up to 3 months.
Other Delicious Biscuits Or Scone Recipes To Try
Before You Begin! If you make this, please leave a review and rating letting us know how you liked this recipe! This helps our business thrive & continue providing free recipes.
Buttermilk Biscuits
These Buttermilk Biscuits are flaky and buttery, melt in your mouth delicious! Incredibly easy to make, completely from scratch and ready in 20 minutes.
Before You Begin! If you make this, please leave a review and rating letting us know how you liked this recipe! This helps our business thrive & continue providing free recipes.
Instructions
-
Preheat oven to 450°F.
-
Combine dry ingredients: In a large bowl add the flour, salt, baking powder and baking soda and mix it all. To it add the cubed or grated butter.
-
Make the dough: Using a pastry cutter or 2 knives, cut in the butter until the mixture resembles coarse meal. If using grated butter, you just have to mix the butter in with the flour. Next, add the buttermilk to the bowl. Stir in the buttermilk until just moist and knead the dough a few times.
-
Cut the biscuits: Transfer the dough to a floured surface and knead it a couple times just until it comes together. Don’t over-work it as it will start melting the butter. Roll out the dough to 1/2 to 3/4 inch thickness, and cut with a 2 inch biscuit cutter. You should get about 12 biscuits. Place the biscuits on an ungreased baking sheet and brush with egg wash. You can also place the biscuits into a buttered skillet.
-
Transfer the baking sheet or skillet to the oven and bake for about 10 to 15 minutes or until nice and golden.
Notes
- Always use cold ingredients! This is the key to a flaky biscuits with separate layers. I usually don’t take anything out of the fridge until I’m ready to use that ingredient in the recipe.
- Do not over knead and be gentle. The more you work your dough, the more gluten you develop, and the more gluten you develop the tougher your biscuit will be and more prone to shrinking. Remember, treat it with love and be gentle.
- Use fresh ingredients, specifically your baking powder and baking soda. The baking powder is what helps the biscuit layers puff up.
- These biscuits will stay fresh for up to 3 days in covered and stored at room temperature.
- They also freeze well, just be sure to freeze them spaced evenly on a cookie sheet before placing in a freezer bag or airtight container. This method will allow them to stay fresh for up to 3 months.
Nutrition Information
Serving: 1biscuitCalories: 281kcal (14%)Carbohydrates: 34g (11%)Protein: 6g (12%)Fat: 13g (20%)Saturated Fat: 8g (50%)Polyunsaturated Fat: 1gMonounsaturated Fat: 3gTrans Fat: 0.5gCholesterol: 48mg (16%)Sodium: 421mg (18%)Potassium: 201mg (6%)Fiber: 1g (4%)Sugar: 2g (2%)Vitamin A: 432IU (9%)Calcium: 95mg (10%)Iron: 2mg (11%)
Notice: Nutrition is auto-calculated for your convenience. Where relevant, we recommend using your own nutrition calculations.


More Stories
The BEST Thermomix Nutella Recipe
Baked Sweet Potato Recipe – NatashasKitchen.com
Baked Ravioli Casserole | Chew Out Loud